Captioning a video makes it accessible to everyone, and also provides marketing and a useful reference tool. But how easy is it to provide captions for the videos you upload to YouTube?
YouTube provides a spot for you to upload your captions file, but making a file like this can seem tricky and daunting at first. The file looks like this:
1This file tells the video player where to start and stop a line of captions.
00:00:03,990 --> 00:00:05,594
Hi. My name is Megan Sparks.
2
00:00:05,594 --> 00:00:08,940
I'm making this video to demonstrate how to caption your YouTube videos.
3
00:00:08,940 --> 00:00:11,799
I have a personal interest in captions because I'm deaf.
Using an online tool like Amara (formerly Universal Subtitles) makes the task of creating a file like this easy. There are other online tools out there, but this tutorial is Amara-specific because I found it very easy and simple to use.
Note: Click on any of the images in this tutorial to enlarge them for easier viewing.
1. Upload Your Video
Upload your video to YouTube. The video needs to be either public or unlisted. Amara won't be able to access a private video to caption it. I suggest making your video unlisted until you get the captions done, then make it public.
2. Plug the URL Into Amara
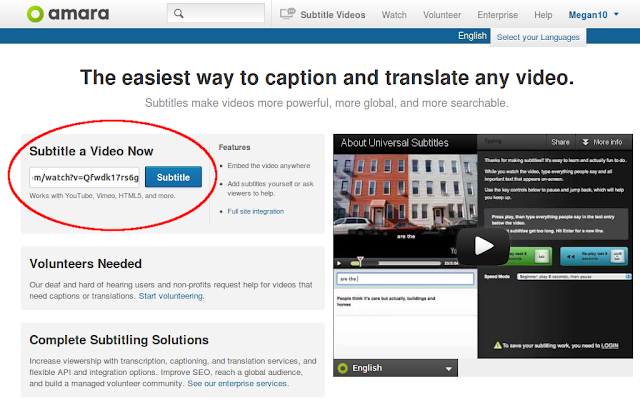
Copy and paste the URL of your video into the appropriate box on Amara's homepage. You don't need to create an account.
3. Type Out Your Captions
On this screen, the video will play in 4-second increments. Type the audio you hear, then hit the Tab key to play the next 4 seconds. Split your text up as you go. This takes a little bit of getting used to, but you can go back and forward as much as you need, as well as delete or edit sections of text you have already written.
4. Time Your Captions
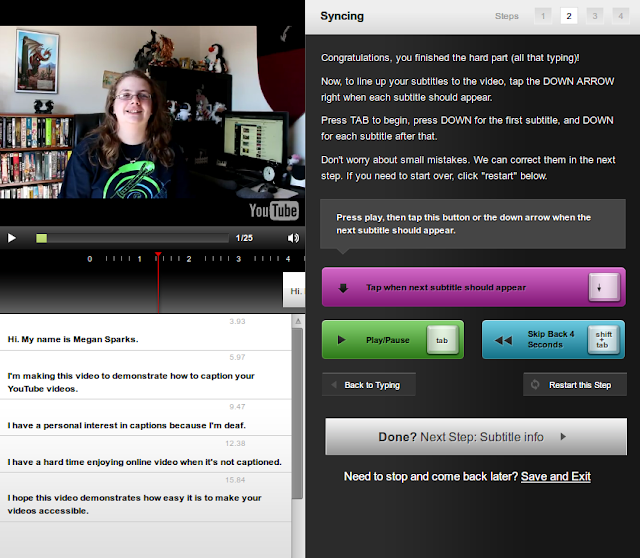
Next you'll need to time your captions to the video. This can seem tricky at first, but it's easy and you can take as long as you need. Just hit the down arrow key as a new line begins. Amara will figure out the timing for you.
5. Add a Title and Description
This will be a title and description for the subtitle file you just created.
6. Get the Subtitles
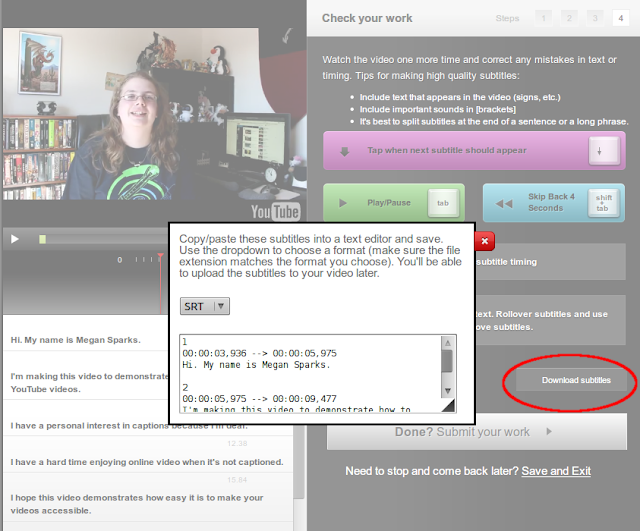
On this page, click on "Download subtitles". Copy and paste the text you see into a text editor and save it with the .srt extension, which YouTube can recognize.
You can also create an account from this page in order to save your subtitles and work on other videos.
7. Upload the File to YouTube
On your video page, click on the white arrow to access the Captions option.
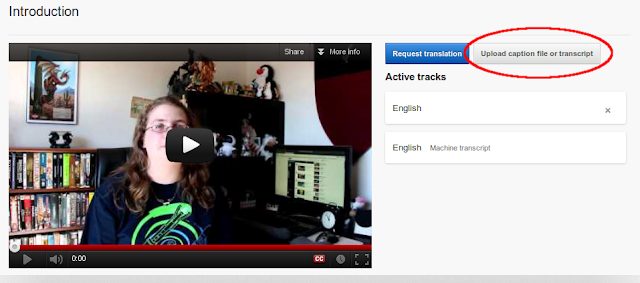
From the page that comes up, click "Upload caption file or transcript." Find your .srt file and select it.
8. You're Done!
Congratulations! You can view the captions on your video by clicking on the "CC" button in the player.
Thank you for making your videos accessible for the deaf and hard of hearing!
If you'd like to see the video I used for this tutorial, you can view it below. I intend to use this video to eventually make a full video tutorial on using captions on YouTube.


No comments:
Post a Comment